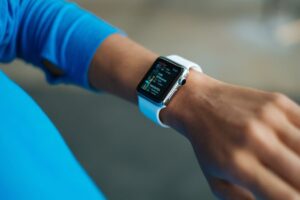
Smartwatches have evolved into more than just timekeeping devices; they’ve become powerful mini-computers that can seamlessly integrate with your smartphone. One of the key features is syncing contacts, allowing you to access important contact information right from your wrist. In this guide, we’ll walk you through the steps to sync contacts on your smartwatch, ensuring you’re always connected on the go.
Step 1: Check Compatibility
Before diving into the syncing process, ensure that your smartwatch is compatible with your smartphone. Most modern smartwatches are designed to work with both Android and iOS devices, but it’s essential to double-check compatibility to avoid any issues.
Step 2: Connect Your Smartwatch
Make sure your smartwatch is paired and connected to your smartphone via Bluetooth. Open the Bluetooth settings on both devices and ensure they are connected. A secure connection is necessary for seamless contact syncing.
Step 3: Access Contacts App
On your smartwatch, navigate to the Contacts app. This app allows you to manage and view your synced contacts. If your watch has a touchscreen, simply tap on the Contacts icon. For watches with buttons, use the navigation buttons to access the app.
Step 4: Start the Sync Process
In the Contacts app, look for an option that says “Sync” or “Sync Contacts.” This option might be located in the app’s settings or main menu. Tap on it to initiate the syncing process.
Step 5: Choose Account
Your smartwatch will likely ask you to choose the account from which you want to sync contacts. If you have multiple accounts (e.g., Google, iCloud, or Microsoft Exchange), select the one where your contacts are stored.
Step 6: Allow Permissions
To access your contacts, your smartwatch may require permission. Follow the on-screen prompts to grant the necessary permissions. This step ensures that your watch can sync and display your contacts.
Step 7: Wait for Sync to Complete
The syncing process may take a few moments, depending on the number of contacts you have. Be patient and let your smartwatch complete the sync. You may see a progress bar or notification indicating the sync status.
Step 8: Access Synced Contacts
Once the syncing is complete, you can access your contacts on your smartwatch. Use the Contacts app to search for specific contacts, view contact details, and initiate calls or messages directly from your wrist.
Step 9: Regularly Update and Sync
To keep your smartwatch’s contacts up to date, make sure to periodically sync your contacts. Smartwatches often offer an automatic sync option that keeps your contact list current without manual intervention.
Tips for Efficient Contact Management
- Organize Your Contacts: Ensure your smartphone’s contacts are well-organized with names, phone numbers, and relevant details. This organization will reflect on your smartwatch.
- Group Contacts: If your phone allows contact grouping, use it to categorize your contacts. This makes it easier to find specific individuals on your smartwatch.
- Remove Duplicates: Periodically check for and remove duplicate contacts. Duplicate contacts can clutter your smartwatch and make it harder to find the right information.
- Use Voice Commands: Many smartwatches support voice commands. You can use voice search to quickly find and call contacts without manually scrolling through your list.
Additional Tips for Syncing Contacts
Syncing your contacts to your smartwatch can be a great way to stay connected with friends and family on the go. You can make and receive calls, send and receive text messages, and even view your contacts’ contact information right from your wrist.
Here are some additional tips for syncing contacts to your smartwatch:
Syncing Contacts on Android Smartwatches (Google Play Store)
To sync contacts to your Android smartwatch, follow these steps:
- Press the power button to wake up your watch.
- Swipe left until you see the Settings app.
- Tap the Settings app.
- Scroll down to the Accounts section.
- Tap Google.
- Tap Sync contacts.
- Tap the Sync now button.
Syncing Contacts on Apple Watches (Apple App Store)
To sync contacts to your Apple Watch, you will need to have an iCloud account. If you don’t have one, you can create one for free.
Follow these steps to sync your contacts to your Apple Watch:
- On your iPhone, open the Settings app.
- Tap your name at the top of the screen.
- Tap iCloud.
- Make sure that the switch next to Contacts is turned on.
- On your Apple Watch, open the Settings app.
- Tap your name at the top of the screen.
- Tap iCloud.
- Make sure that the switch next to Contacts is turned on.
Your contacts will now be synced to your smartwatch. You can access them by opening the Contacts app on your watch.
If you’re having trouble syncing your contacts to your smartwatch, try the following:
- Make sure that your iPhone and Apple Watch are connected to the same Wi-Fi network or Bluetooth.
- Restart your iPhone and Apple Watch.
- Check to make sure that both devices are running the latest software updates.
- Unpair and then re-pair your Apple Watch to your iPhone.
Please note that not all contact information is synced to the Apple Watch. For example, contact notes, addresses, and birthdays are not synced.
Conclusion
Syncing your contacts to your smartwatch is a great way to stay connected with friends and family on the go. By following the steps above and these additional tips, you can easily sync your contacts to your smartwatch and start enjoying all of the benefits that come with it. Whether you want to make a call, send a message, or check someone’s details, your synced contacts will be right at your fingertips on your smartwatch.


